Quick Take-Away:
Installing WPC (Wood–Plastic Composite) terrace tiles on grass can transform your yard in a weekend, with no heavy machinery or concrete work. You’ll enjoy wood-like beauty, easy upkeep, and the freedom to re-arrange or remove tiles later. On the flip side, grass can shift and hold moisture, so you’ll need to prep the surface, add drainage, and do some periodic checks. Read on for the full low-down—step by step, pro and con, tips and tricks.
Introduction: Is It Possible to Lay Terrace Tiles on Grass?
Imagine stepping out onto your lawn and finding a neat, polished deck underfoot—no more muddy shoes, and no expensive excavation needed! Laying terrace tiles on grass is a tempting trick for sprucing up a patio or creating an instant outdoor lounge. By using WPC (Wood–Plastic Composite) deck tiles, you get a surface that looks like real wood but stands up to rain, sun, and foot traffic without rotting or splintering.
Most folks don’t want to call in contractors or rent heavy equipment just to level their yard. With interlocking WPC tiles, you simply snap pieces together right on the lawn. It’s a bit like putting together a giant jigsaw puzzle that doubles as your deck. Want to try it in a new spot next month? Just pull up the tiles and move them—no dusty mortar or cement to break.
Why WPC?
- Durability: Resists fading, mold, and insects (TimberTech).
- Low Maintenance: No sanding, staining, or sealing each year (Cladco).
- Easy DIY: Tiles click together—no carpentry skills needed (NewTechWood).
| Benefit | Grass Approach | WPC Tiles on Grass |
| Prep work | Dig, level, concrete pad | Light leveling, ground cover |
| Installation | Heavy gear, skilled help | Snap-together tiles, free weekend |
| Maintenance | Re-seal wood, treat rot | Sweep, rinse, check weeds |
| Relocation | No | Yes, reuse anywhere |
Pros and Cons of Laying Terrace Tiles on Grass
Advantages of Using WPC Tiles on Grass
- Ease of Installation
- Interlocking tiles snap together like building blocks.
- You don’t need a foundation—just a fairly level surface.
- No Heavy Equipment
- Skip skid steers, cement mixers, and professional contractors.
- Basic tools—a shovel, a rake, maybe a mallet—do the trick.
- Aesthetic Appeal
- Wood-grain look that complements gardens and modern homes alike.
- Available in multiple colors and finishes.
- Quick Demo and Reuse
- Planning a party? Lay tiles Friday night; pull them up Monday if you need the grass back.
- Great for renters or seasonal setups.
- Low Slippage & Comfort
- Composite decks often include anti-slip textures, making them safer in wet weather.
Potential Challenges and Downsides
- Uneven Surface
- Grass and soil can settle or heave with rain and frost, causing tiles to wobble.
- Fix: Add a leveling layer of sand or landscape fabric.
- Drainage Concerns
- Without gaps for water to escape, moisture pools, leading to mold or mildew.
- Fix: Use a permeable weed barrier and leave slight gaps at tile edges.
- Grass Damage
- Grass under the tiles will die, turning into a muddy patch if you leave tiles long-term.
- Fix: Remove existing sod or starve it with a weed membrane.
- Temporary Feeling
- Tiles can shift if heavy furniture is placed without securing clips.
- Fix: Use plastic pedestals or heavy tile-anchor clips.
- Material Limits
- WPC isn’t load-bearing like a raised deck; it’s best for lounging, not heavy planters.
| Pros | Cons |
| DIY-friendly | Needs good drainage |
| No cement, no foundation | Surface may shift over time |
| Can be moved or reconfigured easily | Grass won’t grow under tiles |
| Natural wood look without upkeep | Not as sturdy as built decking frame |
| Slip-resistant textures available | Furniture needs extra anchoring |
How to Install WPC Terrace Tiles on Grass
Preparation of the Grass Surface
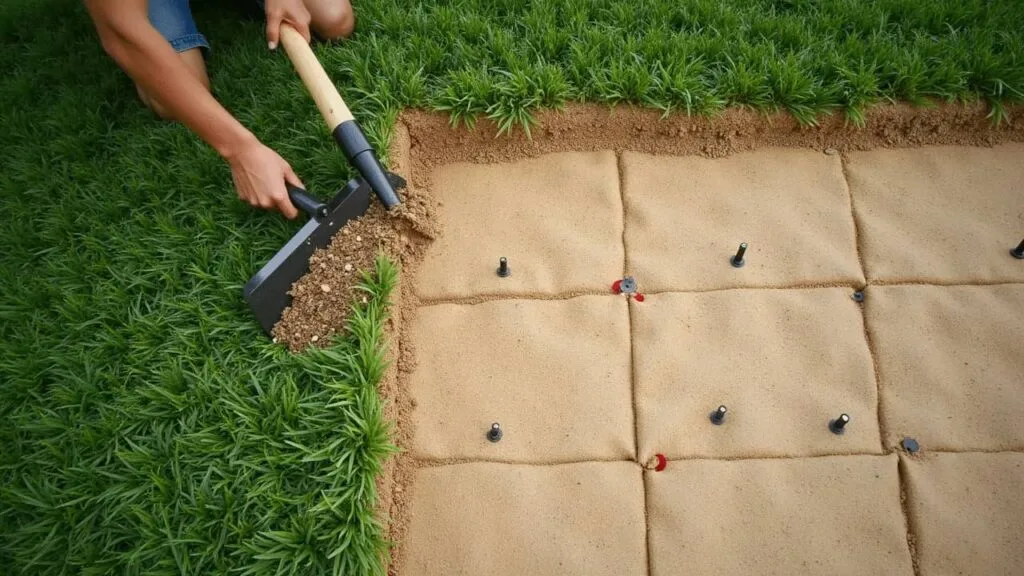
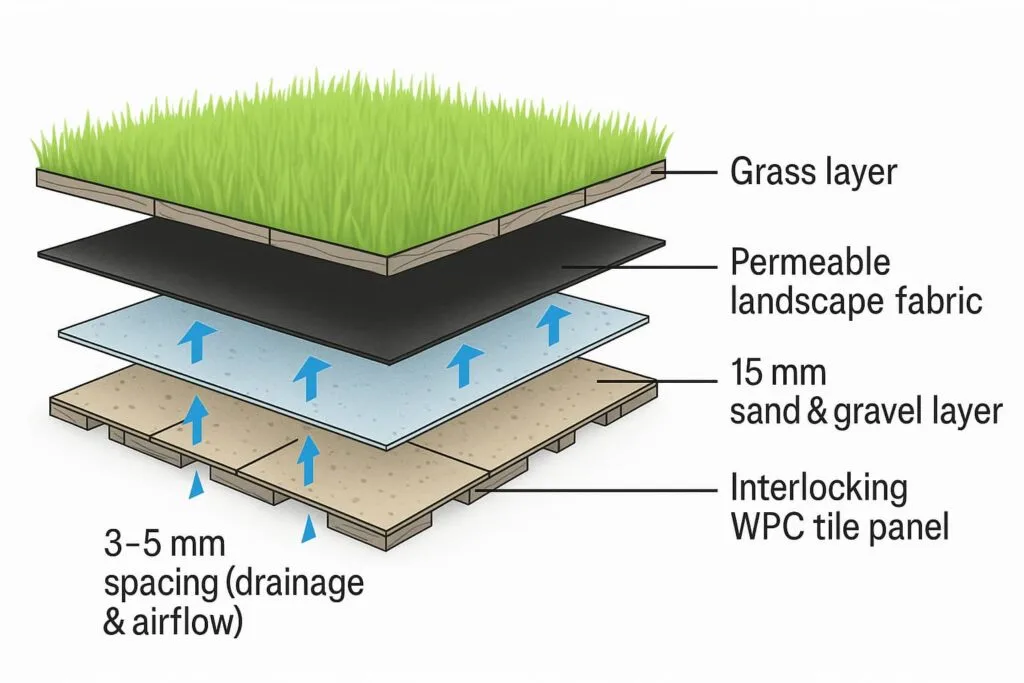
Level the lawn, then lay landscape fabric and a 10–20 mm sand/gravel layer for drainage.
1. Cleaning and Leveling
First, mow the lawn as short as you can. Rake up clippings, leaves, and debris. Walk over the area and mark any soft spots or holes. Use a garden rake to smooth bumps and fill in dips with topsoil. A level surface—off by no more than about 10 mm—is best.
2. Weed Barrier (Optional but Recommended)
Lay landscape fabric over the grass to block new weeds. This also keeps the soil from working its way up between your tiles and causing bumps. Pin the edges down with landscape staples.
| Task | Tools Needed | Why It Matters |
| Mow & rake grass | Lawnmower, rake | Removes tall grass, debris |
| Fill dips & level | Topsoil, garden rake | Prevents tile wobble |
| Lay weed barrier | Landscape fabric | Stops grass and weeds underneath |
| Secure edges | Landscaping pins | Keeps fabric in place |
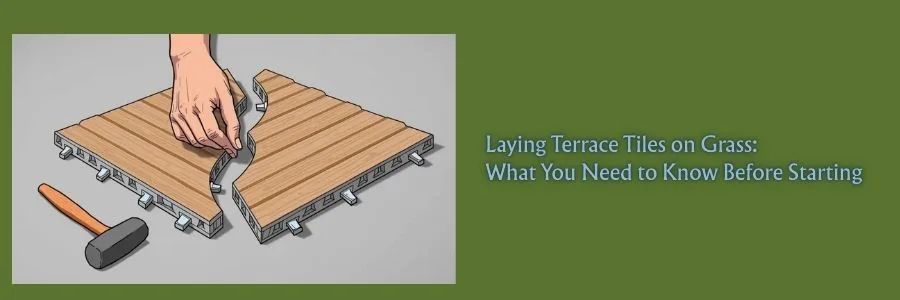
Step-by-Step Installation Guide
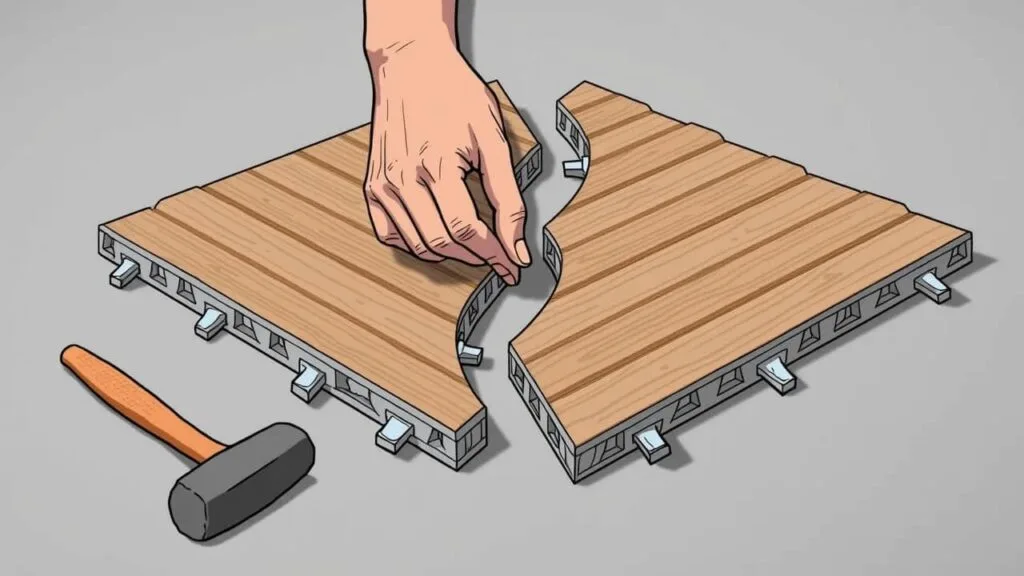
Interlocking WPC tiles click together easily—no nails or tools beyond a rubber mallet.
- Ground Cover Layer
Place a thin layer of coarse sand or fine gravel (10–20 mm deep) to help with leveling and drainage. A few bags spread evenly will do. - First Row
Snap together one edge of the first tile row, aligning against your house or border. A rubber mallet can help click tiles firmly. - Pattern and Alignment
Work outward in a brick or herringbone pattern—or straight lines if you prefer. Always check that edges line up as you go. - Full Coverage
Continue adding rows, interlocking side by side. If you need to cut tiles at borders, mark with chalk and trim with a jigsaw. - Edge Finishing
Use plastic trim or border tiles to give a neat edge and hide cut lines.
Pro Tip: If your yard has a slight slope, start at the high point so water runs off the finished deck rather than pooling underneath.
| Step | Action | Tip |
| 1 | Spread sand/gravel layer | Improves drainage |
| 2 | Lay first tile row flush to border | Use a rubber mallet |
| 3 | Continue interlocking in pattern | Check alignment every 2 m |
| 4 | Trim edge tiles where needed | Mark with chalk, cut with jigsaw |
| 5 | Install border or trim pieces | Hides raw edges |
Tips for Securing Tiles
- Tile Stabilizers: Plastic clips or pegs can anchor border tiles into the soil.
- Avoiding Movement: Keep a slight gap (3–5 mm) between tiles for expansion and drainage.
- Furniture Placement: Use wide-based planters or furniture feet, or fix pads under legs to spread weight.
Maintenance and Longevity of WPC Terrace Tiles on Grass
Cleaning and Care
WPC tiles love a quick sweep and rinse. For leaves, a soft-bristle broom works best. Stubborn dirt or stains can be handled with mild soapy water and a brush—no power washers needed. Annual checks for scratched or loose tiles help you stay ahead of bigger repairs.
Managing Moisture and Grass Growth
- Ongoing Weeding: Pull up any grass or moss that sneaks in under edges.
- Drainage Check: After heavy rain, look for water collecting—lift a few tiles to let it out if needed.
- Airflow: Occasionally lift tiles to let the ground breathe and grass die away cleanly.
| Task | Frequency | Why It Helps |
| Sweep & rinse | Monthly | Removes debris, prevents staining |
| Inspect under tiles | After heavy rain | Ensures proper drainage |
| Pull weeds | Quarterly | Keeps surface tidy |
| Replace damaged tiles | As needed | Maintains safety, appearance |
Replacing or Reinstalling Tiles
Over time, a tile or two might dull or crack. Simply:
- Pop out the worn tile by lifting one corner.
- Snap in a fresh one—most suppliers sell individual replacements.
- Re-adjust the surrounding tiles to ensure a snug fit.
If you move house or want a change, you can take up the whole floor, fold it like a giant pad, and stack it for reuse elsewhere—or recycle it properly at the end of life.
FAQ
| Question | Answer Summary |
| How long do WPC tiles last when installed on grass or soil? | Generally 10–25 years, depending on brand, sun exposure, and maintenance. |
| Will the tiles shift or move over time if laid on grass? | They can—proper leveling, ground cover, and edge clips minimize movement. |
| Can I install WPC tiles on uneven grass or do I need to level? | You should level within ~10 mm for best results; minor bumps are okay with sand layer. |
| What are the benefits of using WPC tiles on grass vs traditional decking? | Faster install, lower cost, re-usable, no foundation needed. |
| Can I remove and reinstall the WPC tiles later? | Yes—just unlock the rows and lift. Perfect for temporary patios or rental yards! |