
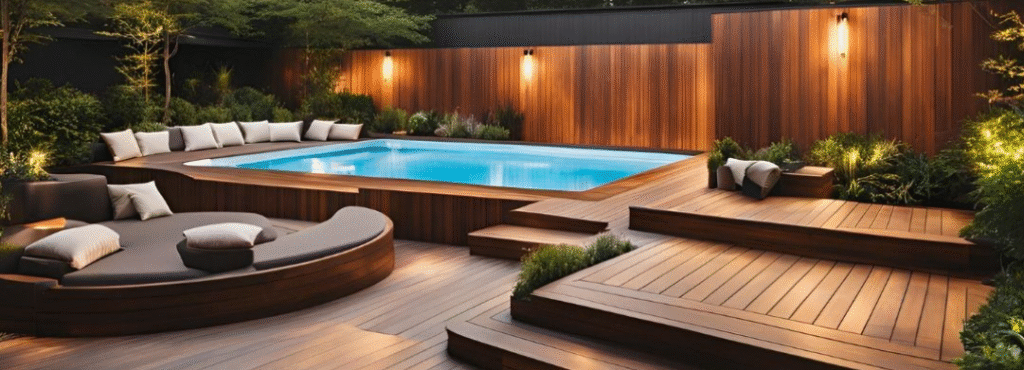
Ever wonder what goes into a flawless composite decking installation? Picture this: a slick, low-maintenance deck under your feet, perfect for morning coffee or evening barbecues. That’s exactly why many homeowners are choosing WPC (wood–plastic composite) boards over timber. This guide—How to Install Composite Decking Like a Pro: Step-by-Step Guide—walks you through everything from prep to polish, using tips that fit the KR WPC audience at krecocomposites.com.
Introduction: Start Smart with Composite Decking Installation
Installing composite decking isn’t exactly the same as laying timber boards. Here’s why:
- Special Spacing – Composite boards expand more, so you need uniform 5–7 mm gaps.
- Unique Fasteners – Hidden clips and starter clips replace ordinary nails or screws.
- Airflow Matters – You must leave 300–350 mm joist centers and vent space underneath to stop moisture build-up.
- Slope for Drainage – A gentle 1–2 % slope helps water run off smoothly.
- Warranty Rules – KR WPC’s warranty hinges on proper clip use, joist layout, and ventilation.
This guide keeps things clean and professional—no fluff. By the end, you’ll have a deck that looks shop-built and lasts for decades.
Preparation Before You Start
Before you grab a board, make sure you’ve ticked all the boxes below.
Tools & Materials Checklist
- Power drill with torque-adjustable settings
- Composite deck clips and starter clips
- Joists (treated timber or metal framing)
- Spacers (5–7 mm)
- Measuring tape, spirit level, chalk line
- Protective gear (gloves, goggles, dust mask)
Planning the Layout
- Design pattern – Straight, diagonal, or herringbone? Mark it out with chalk.
- Board orientation – Running boards parallel to the house usually looks best.
- Drainage slope – Snap a chalk line at a 1–2 % fall (10–20 mm per metre) away from any building.
- Fascia placement – Decide where edge trims or fascia boards will sit for a clean finish.
- Cut list – Measure twice, cut once: list all full and cut boards before you start.
Subframe Requirements
Composite decking needs a solid, well-vented subframe:
- Joist spacing:
- Square hollow boards: 300 mm centres
- Circle hollow boards: 350 mm centres
- Solid boards: 400 mm centres
- Material: Treated timber or corrosion-resistant metal.
- Height: Minimum 50 mm clearance beneath boards to allow airflow.
- Cross-blocking: At butt joints, install double joists to support board ends.
Pro tip: Use galvanised joist hangers for timber frames to keep everything perfectly level.
Step-by-Step Composite Decking Installation
Installing the First Board
- Attach starter clips to the ledger or first joist, spaced every 300–450 mm.
- Align the first board against the house or fixed structure.
- Maintain an 8–10 mm gap from walls or posts for expansion.
- Snap a chalk line along the board edge to keep the run perfectly straight.
- Tap gently with a rubber mallet to seat the board into starter clips.
Laying the Deck Boards
- Hidden fasteners: Slide composite clips into grooved board edges, then screw into the joist at 90° for maximum grip.
- Consistent gaps: Use 5–7 mm spacers between boards to allow drainage and thermal movement.
- Check level every few boards—don’t let small errors add up.
- Mini poll: Which method feels easier—hidden clips or visible stainless screws?
Securing Edge and End Boards
- Fascia boards or L-shaped trims hide cut edges and give a polished look.
- Angle-cut ends for stairs or corners—measure twice, cut once!
- Seal cut ends with manufacturer-approved end-grain sealer if required by warranty.
- Fasten fascia through trims into joists using trim screws or clips.
- Check for overhang: 12–15 mm beyond the subframe is standard.
Expansion and Ventilation Considerations
- Perimeter gaps: Leave 10–12 mm around the deck edge and butt joints.
- Butt joint spacing: 15 mm minimum where two boards meet.
- Airflow: Ensure at least 50 mm clearance beneath decking, unobstructed by insulation or concrete.
- No concrete contact: Never fix composite directly onto a solid slab—air must circulate.
- Maintenance hatch: Consider access panels for future subframe inspection.
Common Mistakes to Avoid
- Skipping joist support or over-spanning
- Sagging and bouncy boards hurt warranty claims.
- Using incompatible fasteners
- Ordinary screws can split or stain boards; use composite-approved clips.
- Blocking drainage or airflow
- Gaps clogging with soil or debris leads to rot in the subframe.
- Neglecting slope
- Flat decks hold water; water damage voids warranties.
- Cutting boards cold
- Always cut boards in shade to reduce thermal expansion during installation.
Post-Installation Tips
Cleaning and Finishing
- Remove sawdust from grooves and surfaces with a brush or leaf blower.
- Rinse with low-pressure hose to clear any residue.
- Inspect for loose fasteners or uneven boards—tighten as needed.
Ongoing Care
- Seasonal wash: Mild soap and water once or twice a year keeps boards fresh.
- No staining or sealing needed—composite resists UV and moisture by design.
- Monthly check: Look under deck for pests or vegetation growth blocking airflow.
KR WPC Product Warranty Reminders
- Follow clip guidelines exactly—wrong clips can void coverage.
- Document installation with photos to support any future claims.
- Keep receipts for all materials—KR WPC may request proof of purchase.
FAQ
Do I need to pre-drill composite decking boards?
Yes—drilling a 1 mm pilot hole in the keel or joist prevents splitting and ensures warranty compliance.
Can I install composite decking over an old wood frame?
Only if the old joists are in excellent condition, correctly spaced (≤ 350 mm OC), level, and free of rot. Otherwise, rebuild the subframe.
Do composite decks need ventilation under the boards?
Absolutely. A minimum 50 mm clearance lets air flow and stops moisture build-up, protecting both boards and joists.
Should composite decking be installed with a slope?
Yes—a 1–2 % slope (10–20 mm per metre) directs water away from structures and prevents puddles.
How do I finish the edges of a composite deck?
Use dedicated fascia boards or L-trim profiles. Fasten them to the joist, maintain a small expansion gap, and seal cut ends if required by warranty.
Ready to tackle your deck? With the right prep, clips, and attention to spacing, your composite deck will look sharp and stay strong for years—no splinters or staining in sight. Happy building!